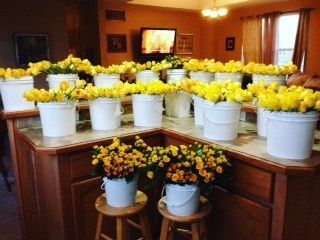


Several people have asked about wholesale flowers, the price, the quality and how it all works. I thought I’d share a few pictures from the day they arrived, and some tips. (I’m by no means a pro, or anything close to the perfection and amazingness that Centerpiece is, but hey – who is, really?)
***Let me start by saying – if you have never done this before, I wouldn’t suggest trying it out for the first time for your wedding. It is time consuming, and also- you want your flowers to look A-mazing. It can be very cost effective, but please don’t stress yourself right before your wedding. I’ve done CPs and bouquets for several weddings – for me, it’s fun and relaxing. I knew it would be just what I needed the week of my wedding to calm me down a bit.